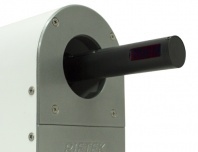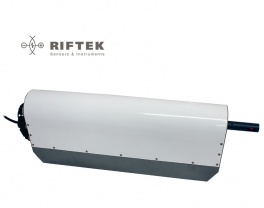
RF096-35/55-100
Pipe ID Control System
| Parameter | Value | |
| Measured ID range, mm | 35...55 | |
| ID measurement accuracy, mm | ±0,05 | |
| Linear translation accuracy, mm | ±0,05 | |
| Pipe depth, mm | 100 | |
| Angle scan resolution, points for turnover | 3200 | |
| Laser sensor linearity, μm | ±15 | |
| Laser sensor resolution, μm | 3 | |
| Laser sensor sample frequency, Hz | 9400 | |
| Laser sensor output power, mW | <1 | |
| Laser safety class | 2 (IEC60825-1) | |
| Light source | red semiconductor laser, 660 nm wavelength | |
| Interface | Ethernet and PROFINET | |
| Power supply, V | 220 | |
| Measurement time, s | <5 | |
| Environmental resistance: | ||
| Vibration | 20 g / 10...1000 Hz, 6 hours for each of XYZ axes | |
| Shock | 30 g / 6 ms | |
| Permissible ambient light, lx | 30000 | |
| Relative humidity, % | 5-95% (no condensation) | |
| Operating ambient temperature,, °С | 0...+45 | |
| Storage temperature,, °С | -20...+70 | |
| Weight (without cables), gram | 6800 | |
Operation of the system is based on scanning the pipe inner surface with a rotating triangulation laser sensor.
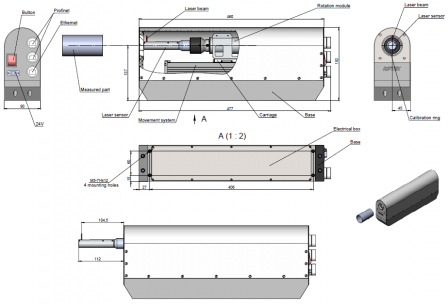
The system contains a base on which the linear translation mechanism, the controller and the interface module are installed. The linear translation mechanism carries the rotation module on which the laser sensor is mounted. On the back of the system there are four connectors for power and interfaces.

Figure 1. System structure
The system operates as follows.
The measured pipe is installed coaxially with the laser sensor. At the command of an external controller, the laser sensor moves into the hole. The sensor begins to rotate and scans the inner surface of the pipe, transmits the polar coordinates of the surface (distance from the axis of rotation measured by the sensor and the corresponding angle of rotation) to the built-in computer to calculate the required geometric parameters. The result is transmitted to the external controller via PROFINET.
Pipe ID Control System
RF096-Dmin/Dmax-L
| Symbol | Description |
| Dmin/Dmax | ID measurement range, mm. |
| L | Measurement depth, mm. |
Example: RF096-35/55-100 - Steel Pipe ID Control System, ID measurement range - 35...55 mm, measurement depth - 100 mm.
Your message has been sent
Fill out another formSomething went wrong. try again
Fill out another form


