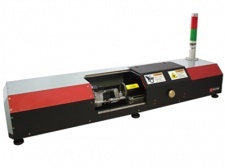
Tube Sheet Holes Measurement System RF013 Series
Basic technical data
| Parameter | Value | |
| ID measuring range, mm |
10...45 (two probes with measuring ranges 10...20 and 16...45) |
|
| ID measurement error, mm |
probe 10...20: ±0.004 probe 16...45: ±0.008 |
|
| Hole depth range, mm | 0...120 (specified when ordering) | |
| Measurement time for one hole, no more, s | 1.5 | |
| Measuring cycle (including transition between holes), no more, s | 5 | |
| Nominal probe rotation speed, r/s | 10 | |
| Light source |
red semiconductor laser, 660 nm wavelength |
|
| Laser output power, mW | <1 | |
| Laser safety class | 2 (IEC60825-1) | |
| Interface | Wi-Fi | |
| Probe power supply | NCR18650GA batteries, 3.7V | |
| Probe weight, kg | 0.6 | |
| Tablet weight, kg | 1.5 | |
| Total weight, kg | 15 | |
| Permissible instability of machine spindle speed | ≤ 10% | |
| Continuous operation time between battery replacements | at least 4 hours | |
The system can use one or more laser triangulation probes RF609-Wi-Fi. The number of sensors and ranges are determined when ordering.
The main components of the laser triangulation sensor and overall dimensions are shown in the figures below:

Picture 1. RF609-Wi-Fi
- Probe
- Housing
- Shank
- Power button
- Wi-Fi antenna
- Charger connector
- Battery compartment cover
- Power indicator
- Tablet communication indicator
- Optical part of the laser sensor
Overall dimensions

Picture 2. RF609-10/20. Overall dimensions

Picture 3. RF609-16/45. Overall dimensions
Main characteristics of the industrial tablet:
| Component | Parameter | Value |
| Architecture | CPU | Intel cherry trail Z8350, 1.44Ghz-1.92GHz |
| OS | Windows 10 pro | |
| RAM/ROM | 4GB+64GB | |
| Display | Size | 10,1" |
| Resolution | 1920x1200 | |
| Touch panel | Touch type | Capacitive |
| Interfaces | Type-A | USB2.0 x1 |
| Type-A | USB.0 x1 | |
| MicroUSB | x1 | |
| RJ45 Ethernet | 10/100/1000M x1 | |
| DB9 RS232 | 9-pin serial port x1 | |
| DC power interface | DC 12V 2A x1 | |
| Protection | Degree of protection | Waterproof IP65, but in fact is IP67 design. Drop 1.2m, 6 sides |
| Certification standards | Military 810G. EU CE, US FCC | |
| Operating temperature | -20°С...60°С | |
| Built-in battery | Battery type | Built-in removable Li-ion Polymer Battery |
| Rated capacity | 10500 mAh | |
| Dimensions | see the figure below | |

Picture 4. Tablet
The operation of the system is based on the principle of scanning the inner surface of holes with a rotating laser triangulation sensor.
Main components of the system:- Laser triangulation probe(s) RF609-Wi-Fi Series;
- Industrial tablet with software.
- The laser triangulation probe is installed in the spindle of the CNC machine, see the picture 1.
- The CAD file of the controlled tube sheet is uploaded into the program on the tablet.
- The operator enters the spindle rotation speed, the probe feed rate and the sequence of measuring the tube sheet holes into the machine program and the system program.
- The tablet is switched to data reception mode, and the scanning program is launched on the machine.
During the measurement process, the machine sequentially, in accordance with the selected algorithm, inserts a rotating laser probe into the controlled hole. The laser probe transmits measurement data to the tablet, and the tablet software calculates the geometric parameters of each hole and displays them in a graphic color code. After completing the measurements, the operator generates a report.

Picture 1. The laser triangulation probe is installed in the spindle of the CNC machine
Tube Sheet Holes Measurement System RF013 Series
Example of item designation when ordering RF013
RF013-IDmin/IDmax-L
| Symbol | Description |
| IDmin/IDmax | Measuring range, mm. |
| L | Hole depth range, mm. |
NOTE: The diameter measurement error depends on the operating range of the probe and is specified separately.
Your message has been sent
Fill out another formSomething went wrong. try again
Fill out another form


